
Abbott firms up the mud dome
The Earth Oven con't
Now we’re going to mix mud and totally encase our sand mold with a 4 inch thick layer of mud (clay, sand, water). This job is best to complete all in one work session because you want each successive layer of mud to bond, and it will bond best if it doesn’t dry out while it’s going up. In other words, if you go half way up and stop for a day or two, then the clay will have had some time to dry out, and when you resume the job, you’ll find that it won’t be so easy to get the new clay to bond with the old. Two people mudding up the sand dome should not take more than a couple of hours to finish the job. This assumes of course, multiple dancing feet mixing up the mud.
Making mud involves real work. Use the Tom Sawyer ploy to enlist support, and the more help you have for this stage the better. Grind it all together doing a Chubby Checker twist routine. Onto a tarp, shovel 2 shovels full of clay and 6 shovels full of sand. We used this 1 to 3 mixture, and it was fine. A 1 part clay to 2 parts sand would also work.
More clay means more oven cracking, although clay creates a better heat sink than sand. Too much sand makes for a weak oven. You have to strike a balance.
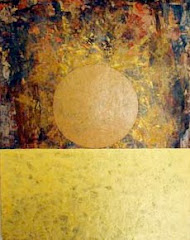
Forming the dome with mud
I have also had the heinous experience of having an oven collapse during a workshop I was leading. The problem was too much sand and not enough clay. Much to my relief, in one hour we rebuilt the sand mold, applied the mud (with the correct proportions of clay to sand) and two hours later we were making pizza.
Strive for a 4 inch thick layer of mud, pack it tightly, but don’t force it against the sand dome because you could damage it. Your mud dome should not touch the stone foundation because you don’t want to transfer heat to an unnecessary place. Start at the bottom and work your way around the sand dome going higher and higher, and as you do so, angle the mud slightly so it comes together evenly at the top. Maintain a 4” thickness all the way, but if in some places it’s 5 inches, then no big deal. But try not to go less than 4 inches because you need the mass for the oven to work properly.
Take a length of two by four and use it to finish shaping the oven. It’s okay to bang the oven with the board as this will help compact the clay. If you see imperfections in the clay dome, and you will, don’t worry about it because the clay dome will be totally encased with insulation, and you’ll never notice. to be con't.


No comments:
Post a Comment