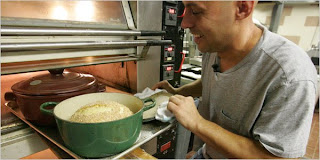
 Mark Bitman's video of his visit to Jim Lahey's Sullivan Street Bakery has been viewed over a half million times. I have looked at the video several times, but I was not able to achieve the results shown, and now I think I have figured out why. After Jim dumps out the dough on his work table, the video is edited, and suddenly he's forming and shaping the dough. Sorry, but you just can't shape such shaggy dough without an intermediate step. My feeling is that what you don't see is extremely relevant. I suspect the shaggy dough is rolled around with flour until it firms up enough to shape. The story in the New York Times also talks about a two hour rest period, but this is never mentioned in the video. To make this excellent bread, you really need to have all of the information. The recipe calls for three cups of flour, but I think you might have better results with three and one half cups.
Monday, October 19, 2009
No Knead Bread Revisited
 Mark Bitman's video of his visit to Jim Lahey's Sullivan Street Bakery has been viewed over a half million times. I have looked at the video several times, but I was not able to achieve the results shown, and now I think I have figured out why. After Jim dumps out the dough on his work table, the video is edited, and suddenly he's forming and shaping the dough. Sorry, but you just can't shape such shaggy dough without an intermediate step. My feeling is that what you don't see is extremely relevant. I suspect the shaggy dough is rolled around with flour until it firms up enough to shape. The story in the New York Times also talks about a two hour rest period, but this is never mentioned in the video. To make this excellent bread, you really need to have all of the information. The recipe calls for three cups of flour, but I think you might have better results with three and one half cups.
Subscribe to:
Post Comments (Atom)


7 comments:
I've made the Fahey no-knead bread many times. Here's the complete technique as I've been able to piece it together.
Fahey's Magic Bread Recipe
450 g King Arthur Unbleached All-Purpose flour, more for dusting
¼ t instant yeast (no substitute)
2 t salt
1 1/2 - 1 5/8 c water (less in humid summer, more in dry winter)
In a medium bowl combine flour, yeast and salt. Add water and fold together (I use a curved silicone dough scraper) until blended very well, scraping up from the bottom of the bowl to make sure all the flour is incorporated; dough will be shaggy and sticky. Cover bowl with plastic wrap and a towel. Let rest at least 8 hours and preferably 12 - 18 at room temperature.
Dough is ready when its surface is puffed and dotted with bubbles. It will be VERY sticky and wet. Flour your hands and your work surface (I use a silicone rolling mat as a work surface) well and scrape it out of the bowl with your dough scraper onto your work surface. Sprinkle it with a little more flour -- just enough to keep it from sticking to your hands/scraper -- and fold it over on itself once or twice. Dust lightly with flour. Cover loosely and let rest 15 minutes. Rinse bowl while you're waiting -- this dough turns to cement quickly. I generally also go ahead and start the next day's loaf during this fifteen minutes.
Using just enough flour to keep dough from sticking to work surface or to your fingers, gently and quickly shape dough into a flat-bottomed ball. I generally have to flip the dough over a few times on the floured surface to get it unsticky enough to do this. Dust work surface and set dough onto surface. Dust top lightly with flour, cover with towel and let rise for about 2 hours.
At least a half-hour before dough is ready, heat oven to 450 degrees. Put a 4 - 6 quart heavy covered pot (cast iron, enamel, Pyrex or ceramic -- be careful about 'heatproof' plastic handles; most are only good to 450) with its lid in oven as it heats. When dough is ready, carefully remove pot from oven. Plop dough gently into pot, trying to center it. If it sticks to one side a little, don't worry too much. If you get it completely off center, shake the pan once or twice to try to center it better, but don't worry too much, it'll straighten as it bakes. Cover with lid and bake 30 minutes, then remove lid and bake another 5 minutes until loaf is beautifully browned. Remove from pan immediately and cool on a rack. Better if allowed to cool completely before cutting.
Because of the various timing requirements, what I've found is that if I start the dough just about the time I'll want to use the bread the next day, I'm golden. So I'm typically making up the next day's dough just before or after dinner, or if I need to take it someplace, I start it around the time the next day's invitation is set for. You've got lots of leeway -- about three hours in either direction -- but you what you don't want to be doing is starting the dough at 8 am today for tomorrow's dinner, if you see what I mean. Dough started at 8 am today would need to be started on it's rising/baking process around 2 am. I've also found that if for whatever reason I can't make the loaf as planned, the recipe is very forgiving. I've made it as long as 40 hours after putting the dough together. It loses a little oven spring, so it's a bit denser, but otherwise it's still good.
I believe Valereee has shared an excellent recipe with us. I have made this bread with 1/4 t of yeast, but I have also made the bread substituting 1/2 cup of sourdough starter for the yeast. My preference is for the starter, but the yeast also works, although the flavor will not be as good.
I find that plopping the dough into an extremely hot iron pot is not a simple matter. I prefer setting the dough down on hot quarry tiles and then covering it with a preheated flowerpot cloche. Works great.
Stu
Stu, I've been wanting to get my sourdough starter started again to try with this bread -- what do you use to start your starter?
To make a sourdough starter, I use only flour and water. If you need the procedures involved, I can post them.
Stu
tried it three times... no yeast, it is sour dough.First time I used starter as most of the dough... sticky and really sour, not much rise. Second time about the normal amount of starter for this much dough, tasted better, formed better (not too sticky) but still a bit low rise. (none were bricks, just not anything like the pictures... tending to spread out rather than stay sort of ball like) Third try I used 2 oz starter.. much better! Even though my son set his book on top of the ball while proofing, it kept it's shape into the oven and ended up twice the height of the first two.
Len
Len
So many things can go wrong when you're baking bread. If you gave me more information, maybe I could figure this out.
First off, you need a viable starter culture. There's a video on my blog that you should look at. It shows the starter bubbling away.
Try to keep your proofing temperature around 70 degree. If it goes up to around 80, you dough could get very sticky.
To make a loaf that weighs around one pound, you shouldn't need more than 1/2 cup of starter.
Becoming a skillful baker really requires a lot of baking.
Hope this helps. Please send some photos.
Stu
Stu,
Here is a picture of the third ball, it was actually quite nice.... the word "was" is important...:
http://www.ovenwerks.net/family/2009/img/SANY0304b.JPG
I am not sure if that will get through. For the sandwich bread I use 8 oz of starter per loaf, (30 oz dough per loaf) but the ferment time is a lot less. With this stuff, 2oz of starter seems to be enough. The loaf pictured above had a school book dropped on top of it for a half hour and only had 15-20 to recover before hitting the oven. So referring to the blog entry which suggests 3.5 cups of flour instead of 3.. I would try a smaller percentage of starter first.
Len
Post a Comment