Friday, November 5, 2010

Keeping The Oven Dry

If you've made an earth oven, then you need to keep it absolutely dry. If you don't, then the oven will revert to its primal state. Mud. Even brick ovens should also be kept dry.
But it's not a simple matter in deciding how to protect your oven. The small oven in the photo has been stuccoed with surface bonding cement. This seems to protect the dome well enough, but the interior surface of the opening gets quite soft when it rains. Probably a brick arch would have helped. Perhaps a better arrangement would be metal roofing, as shown, but since the metal is draped over the dome, I keep wondering if the metal might melt when bombarded by the flames. Trying to always remain vigilant about pushing the fire to the back makes me more than a little anxious. Ideally, the roofing should be quite a bit higher, framed out, above the oven.
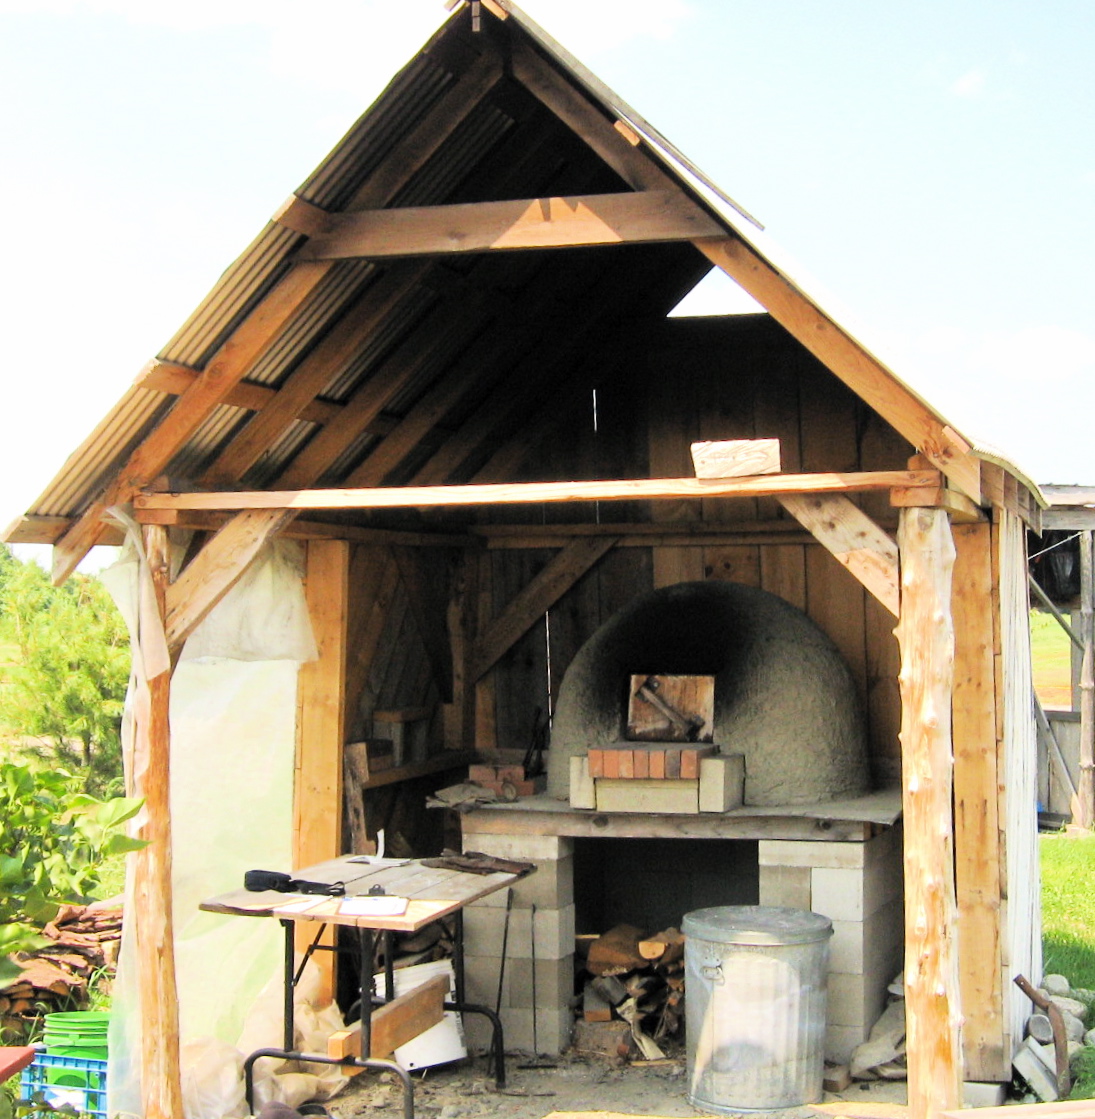
An earth oven extremely well protected

Wednesday, November 3, 2010

Brick and Mud Oven

Many of you already know how to make a brick arch to protect the opening to your mud oven. Following the same process, if you link three arches together and brick up the back wall,  you'll have a brick oven.
 Making your layout

 Assembling wooden form

 First arch in place. Stones hold bricks apart

 Three arches complete with mud filling all the spaces

Fired up

Monday, October 25, 2010

The Dry Stack Brick Oven

 Dave S. Cargo (Escargo) demonstrates the dry stack brick oven technique. Though weighty and somewhat cumbersome, these ovens can be assembled with few prior skills. The only dry stacked brick oven I've built had angle irons supporting the top so maybe it wasn't a true dry stacked brick oven, but nevertheless, works splendidly. Soon I hope to construct an oven like the ones seen below.

 The Dry Stack Brick Oven.

Tuesday, October 12, 2010

Earth Oven Cracks

 If you're going to build an earth oven, you can expect some cracks. 
 
Generally, but not always, cracks do not have an impact on the integrity of the oven. Nobody, however, really likes to look at a cracked oven, but after you insulate and then apply stucco, the cracks may be hidden from view. 
Consider making a mini-oven (photos on this blog) before you make the "real thing." Spend some time experimenting with your clay to sand ratio, remembering that too much water in the mix will make the walls slump. Not enough water in the mix will prevent the clay and sand from fusing, and your oven can fall apart. Too much clay is really asking for severe cracking, but not enough clay could cause your oven to fall apart.Too much sand, and your oven can also fall apart. It's not so simple, regardless of what anyone tells you.
 
Try two parts sand to one part clay, using just enough water to make it all cohesive. 
I like to cut the opening right after the dome is complete, lighting a small fire to dry it out slowly.
You could patch the cracks with clay slip or temporarily with bread dough.
You might prefer, however, to drape a metal roof over the oven and simply forget about it.

Tuesday, October 5, 2010

Painting

 Wikimedia
I really love this painting by Jean-Francois Millet [French Realist Painter, 1814-1875], and I wanted to share it with you. Note the glow coming from the oven and the enormous proofing baskets. You can see the peel's long handle bending under the weight of the dough going into the oven. There's a pitch fork leaning up against the oven, probably for organizing the fuel that might have been dried stalks of some sort from the fields. Bundled brush and twigs were also used to fire the oven. The colors are somber, helping to create a very atmospheric painting.

Sunday, October 3, 2010

Bread Oven Discovery


Although not much to go on, if you have any thoughts about this discovery, Sebastian would really appreciate hearing from you. He can be reached here: Sebastian@asif-khan.com

   http://www.asif-khan.com/ 


I am an interior architect in London currently working on a project in the village of Stonesfield near to the historic town of Oxford.
The owner of an old cottage has asked us to do some minor renovation work and yesterday whilst surveying we accidently broke through an interior wall at low level and discovered what we think is the inside of an old bread oven. Very exciting. We understand that the building itself is one of the oldest in the village and dates to 1690 or there abouts.
We found your blog and think its amazing!
I´ve attached a photo of what we found.. it was difficult to get a camera through the hole we made. It would be really helpful if you could give us your thoughts - maybe you can post something on your blog if it turns out to be a true find!

Best wishes

Sebastian

Sebastian Klawiter


Monday, September 27, 2010

Portable Wood-Fired Ovens

From this humble, human drawn portable
 
to this dazzling beauty from Maine Wood Heat
there is a whole wealth of portable ovens to choose from or you can even build your own.

This portable produced an incredible number of wood-fired pizzas for hungry folks at Maine's Common Ground Fair this past weekend. A number of people have asked me if I thought it was a good idea to get into this type of business, and the answer is not a simple one. When I have more time, I hope to fully deal with this question.


Saturday, September 25, 2010

Back to the Kneading Conference

This video was just released from the Kneading Conference in Skowhegan, Maine, and here's a short clip from the earth oven workshop. 2010

Saturday, September 18, 2010

Danish Dough whisk

I never thought I'd retire my trusted wooden stirring spoon, but after using the Danish dough whisk just once, I knew that the wooden spoon would soon be collecting dust.
The whisk is the best thing I've found for incorporating dough ingredients in a bowl. My Danish dough whisk is made in Poland perhaps by folks who used to live in Uzbekistan. I bought the whisk at Breadtopia, which incidentally is an excellent place to shop.

Danish Dough Whisk


Thursday, September 9, 2010

Can't Wait

One big problem is that it's difficult to be spontaneous when it comes to bread baking. To make the best breads mandates that you shouldn't rush the process. Generally, you prepare your dough on day #1, and you bake on day #2. Fortunately, there is a way around this dilemma.
Jim Lahey talks about how to hasten the process.


The dough for these breads was mixed at at 9:30 this morning, and they came out of my earth oven at 1:48 this afternoon.
I have nothing to complain about