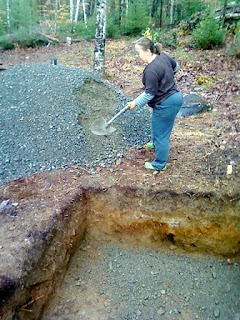
Following up on the last post, I want to add some photos just to give an idea as to how much work was required to complete the oven. It was truly a group effort, and had not everyone really put out, then the oven would not have turned out as well as it did.
Keeping organized and having all the supplies right on the building site when we needed them helped immensely.
Keeping organized and having all the supplies right on the building site when we needed them helped immensely.
Completed Oven
But to get here, check out some of the construction photos.
photo Amanda Slamm
photo Amanda Slamm
photo Amanda Slamm


4 comments:
Were the cinder blocks dry stacked? I see some kind of sand or soil for the first half of the fill, what was used? And what was the perlite mix under the hearth? Was it a mud dome or some kind of commercial fireclay? And then what was the mixture for the cladding?
I loved my mud oven and was thinking of a very similar oven for a more permanent build some day. This looks about right.
Yes, the blocks were laid up dry and then stuccoed with surface bonding cement. Rocks and gravel provide fill between the blocks, except for the last six inches. There we used coarse perlite for insulation. The dome is four inches of mud, insulated with six inches of coarse perlite and then stuccoed with surface bonding cement.
Hope that helps,
Stu
Well, it’s really not easy to construct a brick oven. It requires money, time, and effort to finish this kind of project. Nevertheless, it will all be worth it once you’re done with it! :) I am sure Amanda is really enjoying her homemade treats!
Yes, she's really enjoying her oven, but for the record, this is an earth oven with a simple brick arch to protect the opening.
Stu
Post a Comment