BIALYS (pronounced bee-ah-lees)
I’m not really sure where bialys originated, but my guess would be Poland because that country has a large city called Bialystok. Many Jews emigrated from Poland to America, and some of these émigrés had superb baking skills.
On New York City’s Lower East Side, I know of a bakery that specializes in the production of Bialys; these are chewy rolls with flattened or concave centers into which chopped onion and poppy seeds have been mushed. To my knowledge and taste, this bakery in New York is the only place where authentic bialys are made. I’ve eaten bialys from other American cities, but they were really dismal breads. Your best chance for a good bialy will be in your kitchen after you learn how to make them.
The essence of a good bialy is its chewiness, and one way to produce chewiness is through the use of high gluten flour. In my book Bread In Time, I outline that technique. Another way to get a chewy texture is with sourdough starter, and I’m pretty sure the traditional bialy was made that way and not with high gluten flour. The baker can create sourdough, while high gluten flour is a specialty flour that most likely wasn’t even available when bialys were developed.
You may very well want to double the ingredients in this recipe, which of course, will double the yield. I make this suggestion because bialys are a special treat, and they’ll disappear quickly. Do not double the amount of starter you use. One quarter cup is enough.
YIELD: approx. 12-3 1/2” diameter) bialys
Day one
Ingredients:
1 1/2 cups cool water
1/4 cup sourdough starter
1 1/2 teaspoons sea salt
3 1/2 cups all purpose unbleached white flour
Procedure:
Combine all ingredients into a shaggy mixture using a heavy wooded spoon or a dough whisk. Cover the bowl with a plate and let proof overnight about 12-17 hours. Room temperature should be about 70ºF.
Day two
Ingredients:
Flour for dusting
1/2 cup chopped onions (use caramelized onions for the very best bialys)
1 tablespoon poppy seeds
1/2 teaspoon salt
Procedure:
Your dough should have expanded overnight, and now turn it out on your floured work surface. With floured hands, work the dough a bit by folding it in on itself into thirds. Do this several times, and then cover the dough with a cloth letting it rest about 15 minutes. After the rest period, flatten the dough by hand and then roll it out with a rolling pin to a uniform thickness of about 1/2”.
Cut out the bialys. I use an empty 3 1/2” diameter juice can to punch out the bialys by bearing down firmly. If you prefer, you can cut the dough into 12 equal chunks, and with your hands, press each bialy into shape. Cover them again with a cloth and set them in a warm place to rest and rise for 30 minutes. While you’re waiting, chop the onions and get out the salt and the poppy seeds.
In the top center of each bialy deposit a pinch of chopped onions, some poppy seeds and a tiny bit of salt. With your fist, mush these ingredients into each bialy. Don’t be afraid to mush down hard. It’s important to really press the ingredients into the center of the bialy, and if the dough tears, don’t worry about it. If you’re not diligent about this, the center of your bialy will rise in the oven and you will have made a roll, not a bialy. That’s not exactly a bad thing to do, but it wasn’t part of your plan.
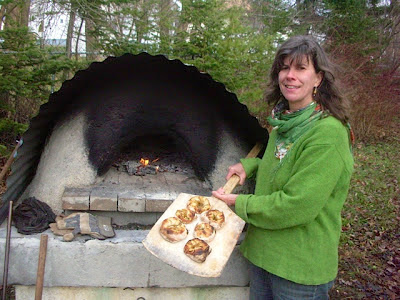
Bake directly on the floor of your oven with a small fire to the back or side. Adjust your fire accordingly and move the bialys around to get them to bake evenly.
Ideally the centers should still be flattened when the bialys emerge from the oven, but this will not always be the case. Don’t worry; they’ll still be delicious even if they rise like rolls.


No comments:
Post a Comment